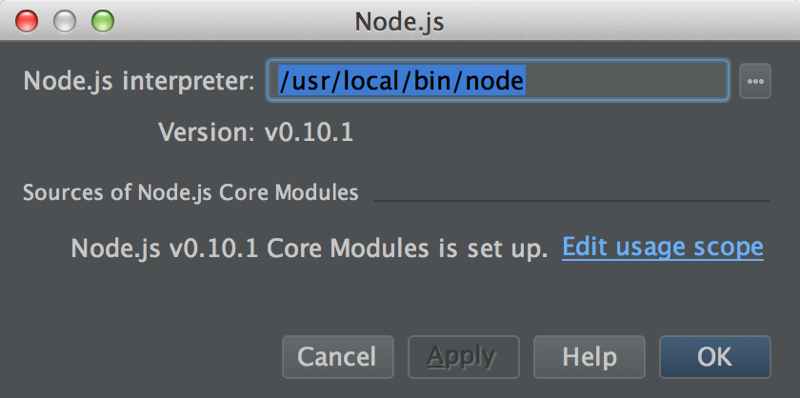
In this post I will explain you how you could set a simple web project to experiment with your favourite javascript libraries. IntelliJ has support for NodeJS, Javascript, HTML and CSS. For NodeJS support you have to install NodeJS framework to you computer. After you install NodeJS, you should install IntelliJ NodeJS plugin and allow it to download source of NodeJS core modules. Without them auto complete will not be available. If you follow default installation procedures, IntelliJ itself will find where your node executable is and with jus a few clicks it will download required sources.

After installing the plugin use the green NodeJS icon on the toolbar to start NodeJS configuration.

IntelliJ will guide you for downloading source code of core NodeJS modules.

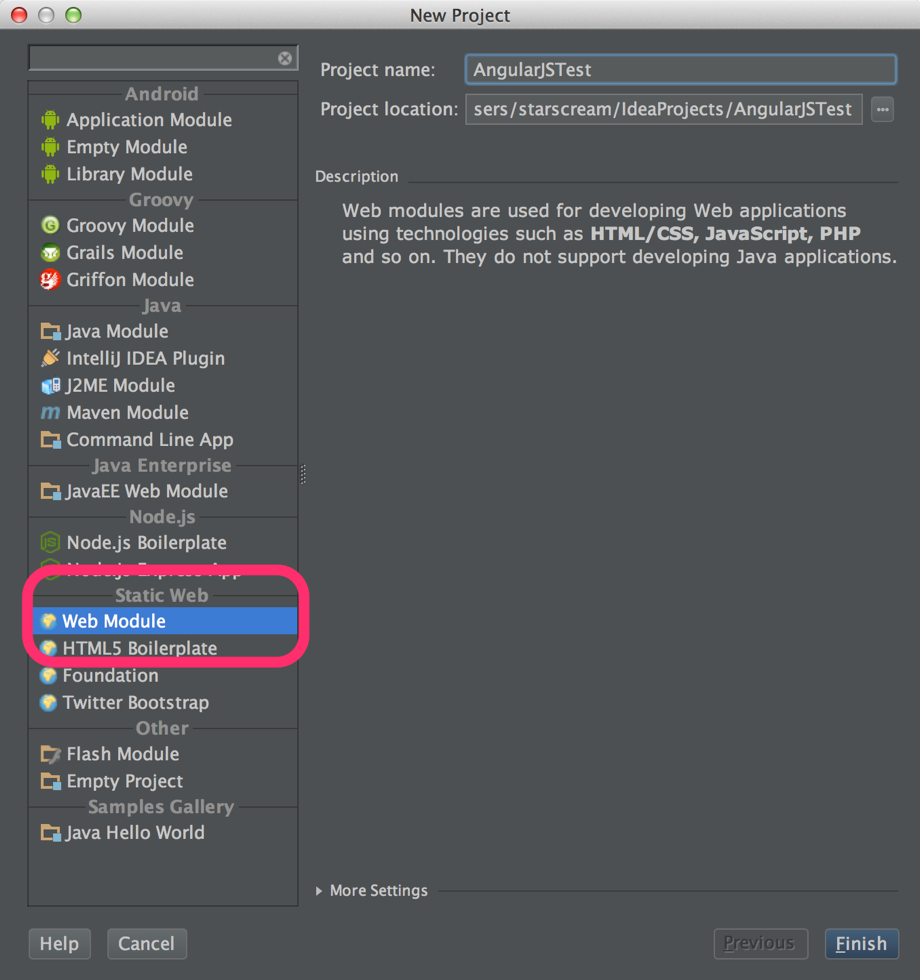
Create a new Project with “Web Module” selection.

We will need a web server, since we have NodeJS installed we could easily run our simple web server using connect middleware for NodeJS. Open command line, and go into the your project folder and Install connect using:
$ npm install connect This will download and install required NodeJS modules in node_modules folder. After that we could write our simple web server using JavaScript.
var connect = require('connect')
connect.createServer(connect.static(__dirname)).listen(8080);
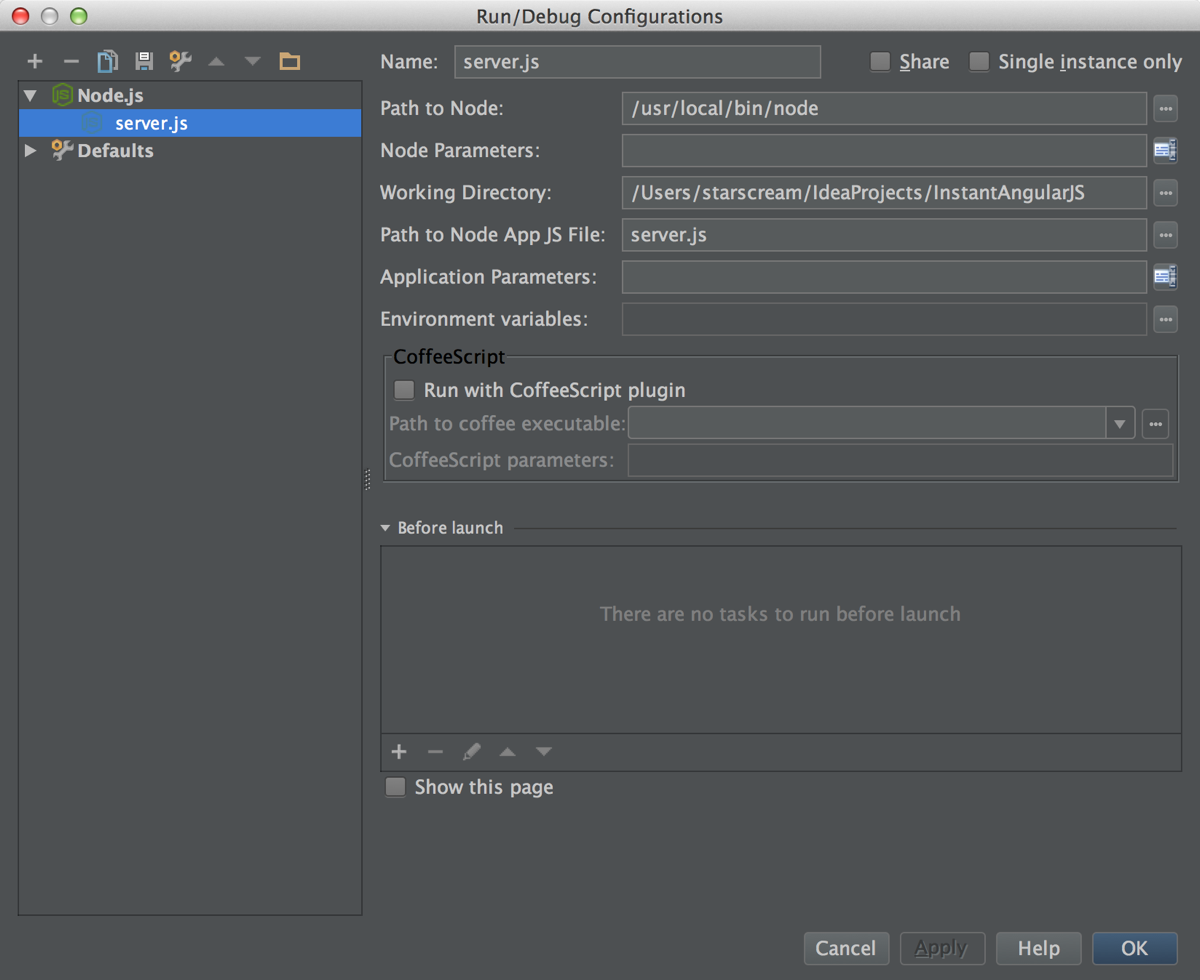
Now we will create a new launch configuration by right clicking on server.js file an selecting “Run server.js” from the menu. This will create a new launch configuration as follows:

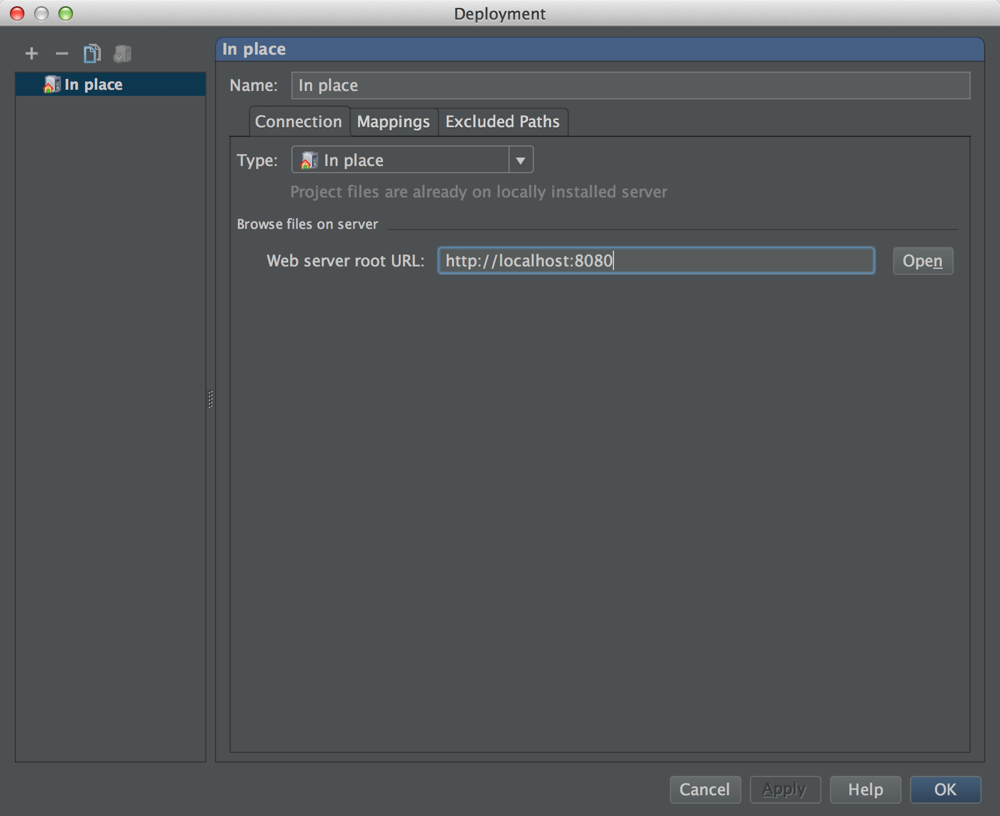
Before running your server, you should define deployment configuration from Tools->Deployment->Configuration… menu. In this screen we will define how folders of our web project maps relative to context root of our web server we have created in above server configuration. Click + sign on top left corner and add a new “In place” deployment using the type combobox. In first screen, enter the web server root URL according to port you have specified in your server.js file. In my case it was 8080.

Click on the Mappings tab and add mappings of you project folders relative to context root of web server. In my case I have specified root of my project folder as root of my web server.

Now we can execute our NodeJS web server using the toolbar as shown below.
